Have you ever wondered why venison tastes bad? Do you find the meat too tough or the flavour gamey? Do your meals come out dry and inedible? Any meat can be ruined by bad handling, even high quality wagyu beef. More importantly, most deer meat can taste amazing with the proper handling. After all, wild venison didn’t earn its reputation as a highly prized table meat by tasting bad! In this article, we’ll look at the 8 biggest reasons why deer meat tastes bad.
I spent my early years working in abattoirs and meat works, so apply much of the knowledge I learned from commercial meat processing to processing wild game. In commercial abattoirs, the kill to chill process (killing, gutting, removing hide, hocks, head and internal organs and getting the carcass into the cool room) for each lamb is between 5 and 8 minutes and between 10 and 15 minutes for beef.
This is a highly mechanised and clinical process that involves many people working together. Speed, efficiency and cleanliness are paramount in this process.
Nobody expects hunters to be able to replicate this in the field, yet we still expect wild game to at least taste similar to the meat we buy from the supermarket or butcher. However, if we want meat of comparable quality, then our goal has to be to at least emulate some of the speed, efficiency and cleanliness of the commercial process.
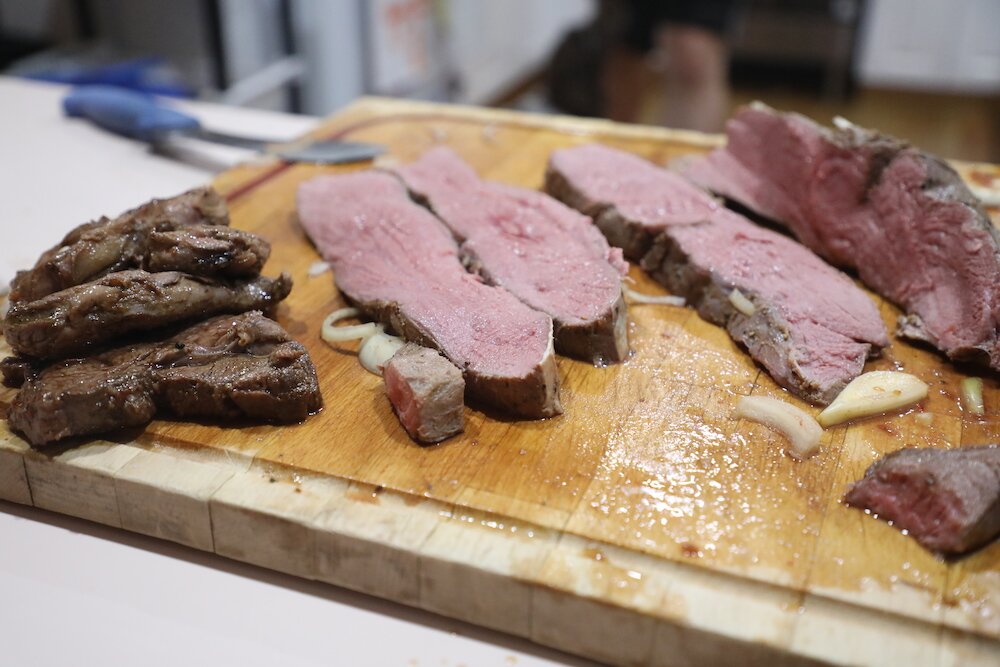 I want to share some of my knowledge and experience of that process to help you consistently harvest high quality wild game meat that you’d be proud to serve to your family and friends.
NOTE: While I refer mainly to deer in this article, the same principles apply to almost any wild game meats and even livestock you have raised and butchered yourself.
1. Poor animal choice
Almost all deer can be eaten but some deer are better for meat than others. It all comes down to what your ultimate goal of hunting is.
If your main goal is meat for the freezer, a younger animal is going to taste better than an older rutting male or a doe who has wasted all her calories feeding fawns. If you want a good quality meat animal, you also need to consider what the animal has been eating. When it comes to wild game, they really are what they eat! If deer are feeding on crops or grains, the meat will taste milder than deer who have spent most of their lives browsing forests or sparse shrubs for food. I recently shot a young fallow buck who had been feasting on crop lands. He was fat, tender and had the most delicious, buttery fat encasing his muscles. On the flip side, I have also shot many old rutting stags, and while their meat is still edible, it wasn’t even in the same ballpark as that tender, young buck!

In those times, I am hunting for antlers first, and the meat is secondary. I need to accept that the meat might be slightly tougher but with proper handling and ageing, it will still be perfectly edible and doesn’t need to be relegated to mince-only.
2. Poor shot placement
There are a number of ethical reasons you should aim for the fastest kill shot possible. Most of these reasons benefit the animal and give it the respectful death it deserves. But there are also benefits to your palate in making a quick, ethical kill.
If your shot placement is poor and the animal runs, adrenaline and lactic acid builds up in its muscles and can affect the taste of the meat.
Similarly, hitting the animal in the stomach can contaminate the meat with entrails, gut contents and gastric juices. While it is possible to save the meat, very few hunters are willing to take the risk – or endure the bad taste!
A head shot often results in a fast death, and preserves all the edible meat. But head shots are considered risky, and therefore, not really ethical unless you are in very close range. Plus, a head shot ruins any chance to retain the head or antlers for a trophy.
One of the best ways I have found to both ensure a quick kill and preserve as much meat as possible is to aim for the heart or lungs. Hitting a vital organ usually results in a quick death, though having said that, I have hit a buck straight in the heart and still had him run. If the animal is particularly large, I will often aim for the front shoulder, as this shatters bone and breaks the leg, making it a lot harder for the animal to run too far. But hitting the shoulder does destroy a lot of usable meat, so I tend to save this for big game like buffalo, sambar deer or antelope.
3. Not cooling the carcass fast enough
Remember the kill to chill times I mentioned for commercial abattoirs? This isn’t just done to push more animals through the chain and increase profits. It is a critical element in food safety. The internal body temperature of a deer is around 38.5 degrees Celsius. In food safety, this is known as the danger zone, the optimum temperature for bacteria to thrive. At this temperature, bacteria doubles in growth every twenty minutes. The longer the carcass stays warm, the more bacteria grows, and the more the meat will be tainted.
In the absence of a commercial chiller, there are some simple techniques you can use in the field to drop the body temperature and cool the carcass as quickly as possible:
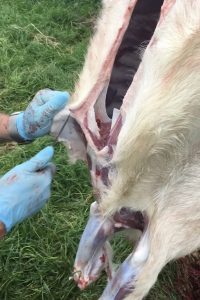
- Field dress as soon as possible after the kill. Many hunters grapple with the question of whether to gut or not. Some hunters choose to butcher the whole carcass in the field without gutting the animal (known as the gutless method). Others choose to transport the whole animal back to camp and gut and process it later. My preference is to gut immediately. This has several benefits. The meat cools more quickly. It is also easier – and safer – to gut an animal while it is still warm. Decomposition starts the minute the animal dies. Internal bacteria converts to gas in the stomach, which causes the intestines to expand and bloat. The warmer the weather, the faster the animal bloats. And once an animal bloats, your risk of piercing the intestines and contaminating the meat increases.

- Bleed the animal. Like many things, hunters are divided on whether to bleed an animal or not. Some swear there’s no need. Others treat it like a religious ritual. For me, it’s far more simple. Blood is warm and as we already discussed, warmth increases bacteria. Therefore, I treat bleeding with the same necessity that I do gutting and do it immediately. The gutting process itself removes blood in the chest cavity but there’s also an artery that runs along the spine. After removing the gut, I split this artery open and turn the deer back onto its stomach. If I’m on a hill, the natural slope helps the blood flow downhill. If the ground is flat, I prop the front half of the deer on a log or rock and create an angle to help with blood flow. I leave it to drain while I clean my hands and knife. There is another benefit to removing the blood. As blood cools, it coagulates, sticking to the meat and making it harder to clean. This can give meat a strong, bloody flavour that some find unpleasant.
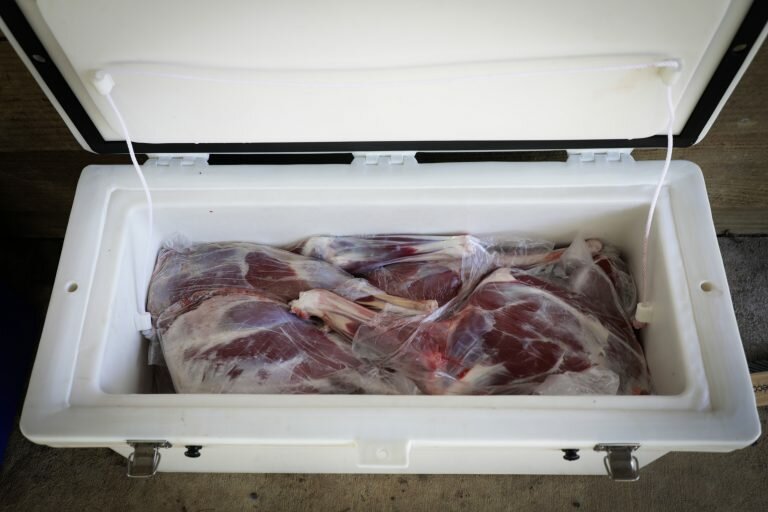
- Airflow and ice – once back at camp (or home), I don’t just leave the deer laying in the back of the truck, or on the ground. I find a tree and hang the deer by its back legs. I have a gambrel to split the back legs open, but a rope itself will do. There are a number of reasons I do this. For starters, it gets air flowing around the carcass, again helping to drop that internal body temperature and halt any bacteria growth. It is also much easier to skin and butcher the deer from this position. If you can’t hang the carcass, or the weather is too warm, quarter the deer and get the meat on ice as quickly as possible. Don’t forget to open the drain on your esky so any melting ice can drain away or you’ll end up with your meat marinating in dirty, bloody water!
4. Leaving the skin on
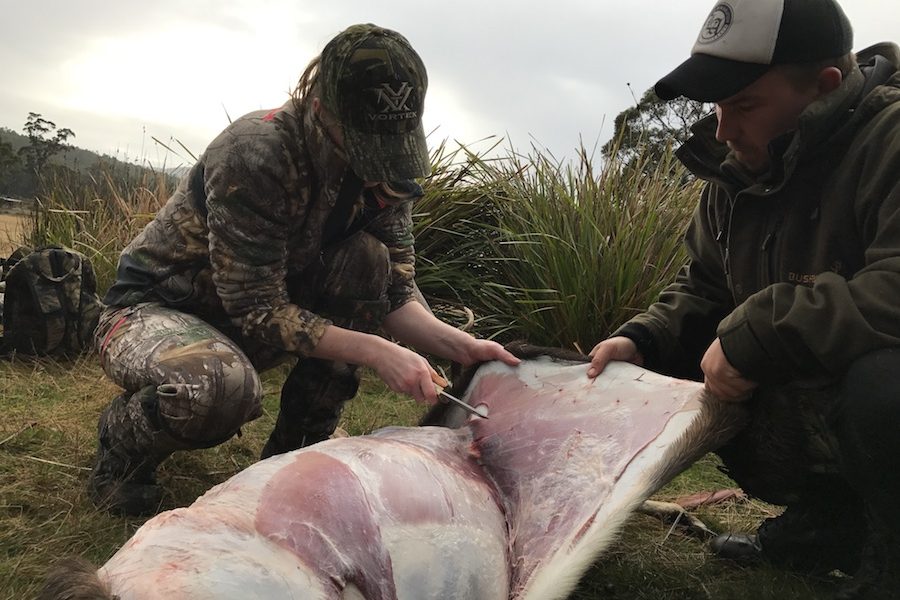 This is one of those contentious issues hunters rarely agree on. Some hunters leave the skin on as long as possible, swearing that ageing a deer in its skin is the best option. Others get the skin off as soon as possible. While there is no wrong method, I definitely prefer to get the hide off sooner rather than later, preferring a clean game bag to protect the meat than a dirty hide.
For starters, it is a lot easier to skin a deer while it is still warm. The cooler the carcass gets, the tougher the skinning process becomes.
Getting the skin off gets air flowing over the meat, which is yet another way to get that carcass cooling as quickly as possible.
But probably the most important reason I get the skin off as soon as I can is to avoid all the contaminates present on the hide.
Deer have some pretty questionable hygiene habits, especially during the rut. Not only do they roll in mud and rub themselves with musk from their scent glands, they also have a nasty tendency to pee all over themselves! It doesn’t take very long for the scents and smells present on the hide to begin leeching into the meat and affecting the flavour. And I don’t know about you, but I’m not really fond of urine-flavoured meat! The hide is also rife with bacteria and germs, which all come in contact with the meat the longer you leave it on.
Whenever possible, I try to get the hide off in the first hour or two, but there are always times when that simply isn’t possible. If I have to transport an animal with its hide on, I try to never leave the hide on longer than 24 – 36 hours at the most. Any longer than that, and you will notice a stronger tasting meat.
5. Poor hygiene
In the aftermath of Covid-19, it seems like the whole world has become obsessed with hygiene. You can’t walk into a store without having to douse yourself in hand sanitiser.
Yet, out in the field, basic hygiene often flies out the window. I have seen guys use the same knife to gut, skin and butcher an animal, without even bothering to wash the blade or their hands in between.
Not only is this one of the quickest ways to ensure your meat is contaminated with guts, blood, hair and bacteria, it’s also likely to result in a nasty infection if you cut yourself with the blade.
Personally, I keep a field knife in my pack for gutting, and have a pack of knives in my car that I use to skin and butcher the carcass. You can use the same knife for all three tasks, but make sure to wash the blade and clean your hands thoroughly in between stages. I always keep a pack of baby wipes in my pack for a quick, easy clean down in the field. But even some hand sanitiser, or a bottle of water and some tissues would do.
 Make sure your blade is sharp too. While a dull blade isn’t going to affect the taste, it does increase your chance of making a mistake like piercing the gut or intestines, or cutting yourself!
6. Breaking bad(ly)
 You don’t need a power saw to butcher a deer. In fact, I highly recommend you stay away from the power tools unless you have a food-grade meat saw. The last thing you want is a mixture of bone fragments and sawdust peppering your meat!
All you need to break down and butcher a carcass is a good quality knife with a sharp blade.
It is important to keep the meat as clean as possible during this stage. If I cannot hang the carcass while I butcher it, I lay it on a clean tarpaulin or drop sheet on the ground, removing as much hair, dirt and blood as I can from each portion of meat before wrapping in a game bag or putting in a plastic bag.

If I am butchering the meat at home, I wipe the meat down with a damp cloth and a vinegar/water solution and pat dry before vacuum sealing the meat into bags ready for ageing.
Cut away and discard any meat that is bruised, contaminated or questionable.
It is also important to remove the scent glands.
Deer have seven major scent glands. These are located in their forehead, under the eyes (pre-orbital), in the nose (nasal), inside their mouth (salivary), between the toes (interdigital), on the back of the hind legs (tarsal) and on the front of the rear legs (metatarsal). Male deer also have a scent gland in their penis (preputial).
 The main ones you need to worry about when butchering are the glands in the legs: the tarsal and the metatarsal glands. The tarsal glands are located on the inside of the rear leg, just above the knee joint. These glands secrete fatty lipids that interact with deer urine to create a unique odour that serves as the deer’s ID card. The metatarsal gland is further down the rear leg and helps regular body temperature.
 You can see these on the meat as greyish, gelatinous discs. If you have ever cut into one, you’ll know they don’t smell great – so leaving them in the meat is going to affect the flavour. Simply cut out and you remove a lot of that strong taste.
7. Skipping the ageing process
Whenever hunters tell us that venison is tough, we usually ask how long they age the meat for. Cue the blank stare or the long-winded spiel about how unnecessary it is, how it doesn’t make a lick of difference to how venison tastes, and how it rots venison.
And while hunters are free to do as they please with the meat they harvest, I have always considered foregoing the ageing process to be bad science!
Meat goes through several metamorphises after death. Without human intervention, the body bloats, then stiffens (rigor mortis), then begins to decompose and rot.
But cooling the carcass and keeping it at a regular temperature breaks the decomposition cycle and instead, creates magic!
As the meat relaxes after rigor mortis, the cool temperatures allow the natural enzymes in the meat to break down the muscles, sinews and connective tissue (collagen). This ageing process tenderises the meat and removes a lot of the gamey flavours. It’s what sets good and bad meat apart.
When it comes to ageing meat, there are two ways you can do it: wet age or dry age.
To wet age your venison, butcher and debone your meat into prime cuts, then vacuum seal these into food grade plastic bags, removing as much oxygen as you can from the bag. I double seal our bags to ensure a tight seal. Store in the refrigerator.
 The longer you leave the meat, the more the fibres will break down and the more tender the meat will become. Young deer need 3 – 5 days, while older deer can be left to age for 1 – 2 weeks. I have accidentally left meat in the fridge for 4 weeks, and it was beautiful.
Remove from the refrigerator at the end of the ageing process. Check each bag carefully for any leaks. If the seal has broken, remove the meat from the bag and examine it. If you notice any bad smells or discolouration, discard the meat. If it smells good, place in a clean bag and reseal.
Meat is now ready to eat or to go in the freezer.
Because meat is wet-aged in its own juices, there is very little wastage or shrinkage. This makes wet-ageing a cost-effective and efficient way to age meat. In fact, the vast majority of the meat you buy from your butcher or supermarket has been wet-aged.
With dry ageing, the carcass or quarters are hung to dry in a cool room or a cool basement or shed with plenty of airflow (if using the latter, make sure the meat is safe from bugs and rodents). Optimal temperature should be above freezing but below 4 degrees Celsius. Some people modify refrigerators to serve as mini cool rooms, or you can buy special humidity controlled devices to dry age smaller portions of meat, similar to a wine fridge (and just as expensive).
As meat dry-ages, it purges moisture, creating a more meaty, robust flavour. It isn’t gamey but ends up being like a good quality beef flavour, which is why dry-aged meat is highly sought after and most often found at expensive steak houses. Because the process purges moisture, dry aged meat can lose up to 30% of its body weight. A dry crusty fungus also forms around the meat. This isn’t rotten. Think of it like the crust that forms on cheese, protecting all the juicy goodness inside. However, the crust needs to be cut off prior to use and does add to the perceived waste of dry-ageing.
Age for 7 – 14 days, as per wet ageing process.
I have personally tried both wet ageing and dry ageing venison, and while I love the flavour of dry-aged meat, I don’t really have the set-up at home. I find wet-ageing to be simple and less prone to getting it wrong.
We age all meat we hunt: venison, wallaby, kangaroo, rabbits, even ducks. The only meat we don’t age are the off-cuts we use in mince, as the mincing blades are pretty good at breaking down the tough meat and fibres.
8. Choosing the wrong meat for your recipe
 Some hunters take the backstraps (loin) and relegate the rest of the meat to the mince pile (or worse, dog food).
Others use all the meat but often choose the wrong cut and then complain about poor results.
There are also lots of opinions on deer fat. Many hunters will tell you it tastes bad and, while that statement can be true, not all deer fat is created equal.
Deer fat is high in Omega-3 fatty acids. It contains high levels of stearic acid, the fat that reduces bad cholesterol and increases good cholesterol.
Stearic acid coats the mouth and gives you that mouth feel that comes from eating fat. Some people like that. Others hate it. If you’re in the latter group, try cooking venison with something acidic like tomatoes, fruits, or even wine, to cut through the fatty mouth feel.
The high levels of Omega 3 fatty acid do make deer fat susceptible to going rancid if left exposed to air (the same applies to pork fat). If you are wet-ageing your meat, you can leave some of the fat on and there shouldn’t be any bad tastes. However, if the meat wasn’t chilled fast enough, or it is going to be exposed to oxygen (either through dry-ageing meat or if you are using the meat for dry-aged salamis or cured meats, you might be better off cutting off the fat and using a replacement. If in doubt, cut it out.
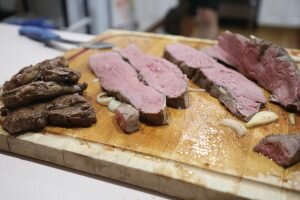
It is also important to choose the right cut of meat for the recipe or style of cooking. Prime cuts of venison are usually cooked quickly and served on the rare side. The longer you cook a prime cut, the tougher and chewier it is going to get.
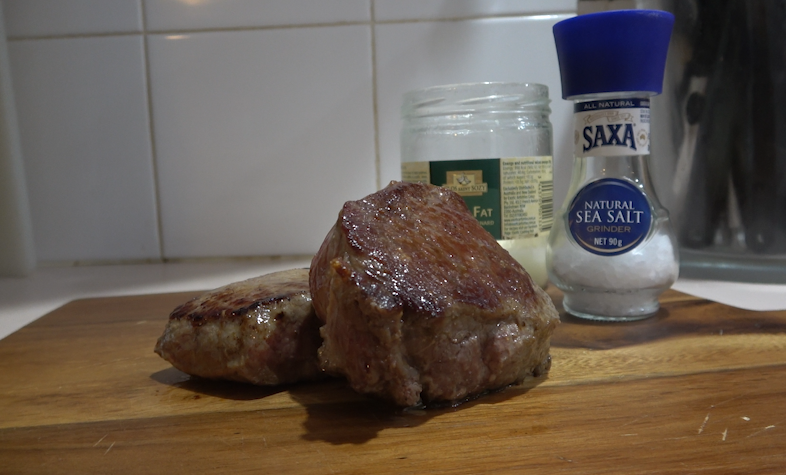 Use leaner prime cuts like backstrap, tenderloin or rump as steaks or in stir-fries. Rump is also good for dried meats like biltong or jerky.
Don’t forget the heart. It is super tender – even more so than tenderloins.
Neck meat is an under-rated meat that is super soft and naturally tender. This makes it good as both a prime cut, or for slow-cooking and curries.
If roasting venison, a rump or shoulder cut with a layer of fat is a good choice. If choosing a leaner cut, be sure to add some fat to the cooking pan or you’ll end up with a dry lump of tasteless meat.
Most other cuts require longer, slower cooking methods to break down the fibres and connective tissue. The best choices for slow cooking, casseroles and curries is the meat brisket, front shoulder or shanks. The higher fat content and collagen in these cuts also produces a lovely, rich sauce or gravy. As already mentioned, neck meat is also great in slow-cooked dishes.
If you do use a leaner cut, like rump, choose a creamy sauce or add fat or bacon, as slow cooked rump can end up dry and tasteless.
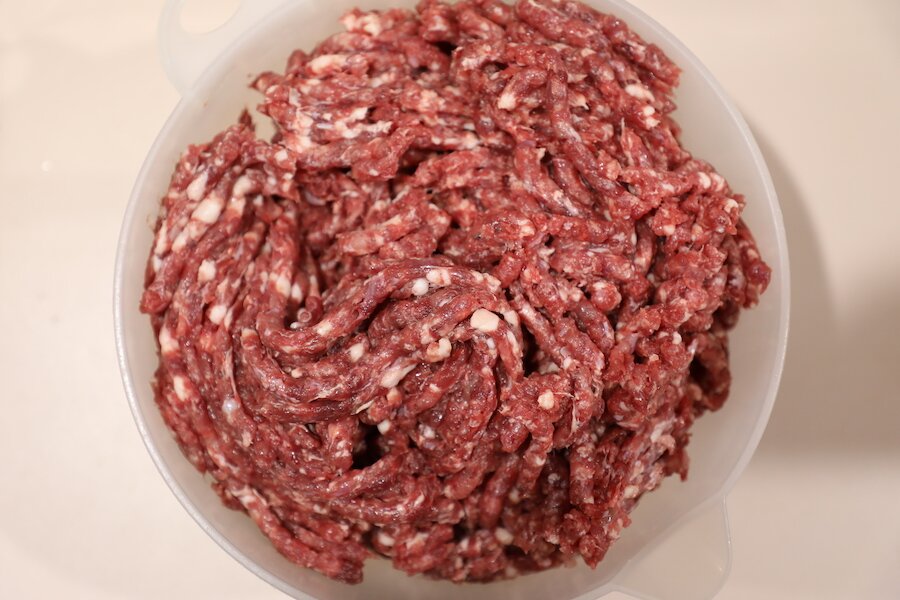 Sausage and mince needs fat. If you are mincing a lean cut, like rump, you need to add between 20 and 30% fat to the mix (unless you like your food to taste like sawdust and to fall apart). We mince the off-cuts from between the ribs, the belly meat, the flank, sirloin and top-round and add extra pork or beef fat to the mix. Failing that, you could mix it with bacon.
Some of the best deer fat you will find is the thin, lacy fat membrane that covers the entrails – or caul fat. Use this to wrap leaner cuts of meat, such as heart or rump. You can also use it to wrap rissoles or sausages in.
For more ideas on cooking wild game meats, check out the recipes in our Game Kitchen.
What is I Am Hunter?
I Am Hunter wants to change the way hunting is perceived and to change the conversation from a negative one driven by anti-hunters to a positive one led by hunters.
Our goal is to help hunters become positive role models and ambassadors for hunting, while simultaneously helping non-hunters understand why hunting is important.
You can become a supporter and help us achieve our goal and spread a positive message about hunting with the wider community.
Related content
If you would like to know more about hunting wallabies, kangaroos or deer in Tasmania, check out these related articles and podcasts.
Our other channels
Follow us on Facebook
Follow us on Instagram
YouTube
Subscribe to our YouTube channel.
Get our newsletter
Get our free monthly newsletter direct to your inbox
Listen on iTunes
Listen to our podcast on iTunes.
TV series
Watch I Am Hunter episodes on My Outdoor TV (MOTV)
178 thoughts on “8 reasons why deer meat tastes bad”
Excellent article
Good article. To better understand the aging you can follow the Scandinavian method for “day grades” this accounts for temperature variations that “X number of days” doesn’t do.
Aging is temperature and time. Not just time. After all, it all boils down to chemistry.
https://www.tasteofthewoods.com/blog/the-knowledge-behind-aging-meat-1