
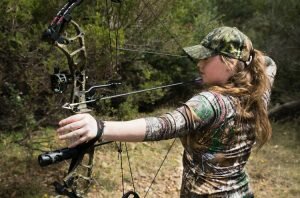
We often get asked how to sight in a compound bow. In this tutorial, we give you the steps you need to sight in a fixed pin bow sight on a compound bow. It also includes some other helpful links for paper tuning your arrows and avoiding bow torque.
Things you need
- Compound Bow
- Arrows
- Allen wrench
- Target
- Range Finder
1. Set pins in middle of sight
Before you start shooting, make sure that your middle/anchor pin (if a multi-pin sight) is vertically centred in the middle of the sight body. This will give you maximum room for adjustment when sighting in your top (close range) and bottom (long distance) pins. This should already be the case on most out-of-the-box sights.

2. Set up the target
When setting up the target, make sure you have plenty of room to shoot to at least 30 yards with nothing in your firing path. Clear any long grass or branches around the target. You don’t want your arrow to come into contact with anything during its flight as this will throw off the accuracy. When first sighting in a bow, it is useful to have a backdrop of some sort behind your target e.g. a hay bale, mound of dirt etc. This will save you a lot of drama should the first few arrows miss the target.
Note: modern compound bows can send an arrow a fair distance at high speed so it is always a good idea to be aware of what is behind your target. This applies whether you’re practicing at home, down at the archery club, or out hunting. Be aware of your surroundings.

3. Check your equipment
Give your equipment a quick once over. Make sure nothing is moving that shouldn’t be moving, give your sight and arrow rest a gentle wiggle, tighten if necessary. Check your arrows for any cracks or fractures, check to see that your target points are tight and that your fletching don’t have any cuts or splits.
Checking all of these things will limit the chances of your arrows flying askew. Even the slightest imperfections can send an arrow off course.
It is a good idea to learn how to paper tune your bow and arrow setup to ensure that you’re starting from a solid platform. Here is a great tutorial by Lancaster Archery on how to paper tune your setup.
4. Correct stance and anchor points
Making sure your stance and anchor points are consistent is a very important part of shooting accurately. Changing the way you stand, your grip on the bow, or your anchor point (where the hand you draw the bow string with meets your face) with each arrow is like removing and remounting a scope on a rifle between each shot. You are never going to know if it is the bow or your stance that needs changing.
Figure out how you want to stand, your grip and your anchor point and then practice doing this again and again and again until it is second nature. That way when a shot doesn’t go to plan you can be pretty sure that it is something on the bow that needs to be changed.
Just remember that you might have off days. If your bow was shooting pretty well on target yesterday or the last time you practiced, and now it’s all over the place, just wait. Don’t change anything immediately. Check in with yourself – make sure your doing everything the same (I keep a note on my phone with check points). If your upper body is fatigued (due to exercise etc.), this can effect your accuracy. Come back in 20 mins or maybe even tomorrow and try again. If it is still all over the place, then you can start to look into the bow itself.
Here are some pointers on your stance:
- Standing straight with feet perpendicular to body
- Bow grip resting nicely in the palm of your hand between your thumb and index finger. Relax your hand, let the bow sit naturally and do not close your hand tight around the grip (this increases the chance of torquing your bow).
- Bring the string back to the same point on your face every time. For me, my thumb sits just under my jawline and the back of my hand lightly touches my ear. But you will find your own anchor point that is comfortable for you. Look for a position that is comfortable and repeatable.

5. Start with your top pin
There are two ways that you can adjust your bow sight. The first is by moving the entire sight body. Depending on your bow sight, you should have a knob or a screw for vertical adjustments and another one for horizontal adjustments. The second is by making (vertical) adjustments to each individual pin.
You want to start by making adjustments to the sight body only.
Your target should be set up so grab your bow and your range finder. We sight our bows in using yards rather than meters – make sure your range finder is programmed for the measurement you want to use. Stand 10 yards from the target (use a range finder), aim at the bullseye using the topmost pin and release. Shoot 2 more arrows at the same bullseye.
Before you make any changes, try and get a group of 3 arrows within a 3-5cm area. Getting your arrows within a small group will give you a better indication of where your sight needs to move.
Tip: If the shot feels bad, repeat the shot. Sometimes you will shoot and instantly know that shot didn’t feel good, maybe you pulled the shot or you flinched, maybe you just had a little too much tension or forgot your anchor points. Whatever it is, repeat the shot. No use adjusting if the shot wasn’t right.
6. Adjust your sight
The bow sight needs to follow the impact of the arrow. This means if your arrow is shooting high you need to lift the sight higher. Always follow the direction of the arrow. Likewise if the arrow is shooting to the right, adjust your sight to the right. How far to move the sight really depends on how far off your group was. Start small, shoot another group, see what difference it made and go from there.
7. Anchor pin
Once you are consistently shooting in the bullseye at 10 yards with your top pin you can move on to your anchor pin. This will be the middle pin (or closest to the middle) and depending on your sight could be the second (3-pin) or third (5-pin or 6-pin). The idea is to sight your bow in keeping the anchor pin centred in the sight body then going back and adjusting your other pins individually (without moving the sight body). This will give you enough room to get a good shooting range out of your pins (hopefully from 10-50 yards or something similar).
Left and right adjustments shouldn’t change much between your 10 yard and anchor pin (a small adjustment may be needed once you pull the distance out further).
To start sighting in your anchor pin, move to the distance your anchor pin is going to be set at. For a 3-pin sight, you might want your pins to be set at 20, 30 (anchor pin) and 40 yards. For a 5-pin sight, you could have your pins set at 10, 20, 30 (anchor pin), 40 and 50 yards.
As you did with the first pin, shoot groups of 3 and wait to make adjustments when your arrows are hitting groups between 3-5cm. Remember that you are still making adjustments to the sight body at this point, not the individual pin.
8. Remaining pins
Once your anchor pin is sighted in, you can then individually adjust the remaining pins. You will need to go back down to your closer range pins. A quick note to avoid confusion – you sighted in your first pin at 10 yards initially but this doesn’t necessarily mean your first pin has to stay at 10 yards. You will need to go back and re-adjust that pin anyway and the distance you settle on largely depends on the circumstances you are going to be shooting in. If you know that the absolute majority of your shots are probably going to be between 20-60 yards, sight your pins in accordingly. I would always recommend using increments of 10 yards between your pins (this is explained further in the notes below).
You will notice that the distance between your pins will get larger as you get further from the target. Meaning the distance between your first and second pin will be smaller than the distance between your third and fourth or fourth and fifth pins. This makes sense considering the trajectory of an arrow. Much the same as with a bullet, your arrow is going to lose elevation faster as its speed decreases (the further it gets from the bow). Remember when moving the pin on to follow the path of the arrow.


6 thoughts on “Sighting in your compound bow (fixed pin sight)”