What is field dressing?
It doesn’t really matter whether you hunt for meat or trophies, or even a combination of the two, there’s a set of actions that need to be undertaken after the shot is taken to get your animal out of the field and back to your camp or car.
This is called field dressing, whereby you remove the entrails and prepare the animal for processing and transport.
Depending on how you plan to use the animal, the process of field dressing may differ slightly.
For meat hunters, field dressing is all about removing the entrails and getting the animal ready for meat processing as quickly and efficiently as possible.
For trophy hunters, field dressing is about preparing the horns and skin for taxidermy.
If you’re a combination hunter, and take both meat and trophy, then field dressing is a hybrid of both approaches.
In this tutorial, we’re going to outline the steps you take to prepare an animal for meat harvest.
This is a vital first step in ensuring you harvest the best tasting game meat possible.
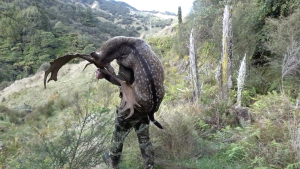
We cannot stress how important it is to do this as quickly as you can, as it is an important factor in cooling the carcass, slowing bacterial growth, and removing any contaminates such as blood or stomach contents, which can all have a detrimental effect on the taste of your game meat. In other words, while it may seem ‘cleaner’ to do this back at camp or home, we strongly recommend doing this as the name implies – in the field! Not only will your stomach thank you for it later, so will your back, as a whole animal is significantly heavier to carry out than a gutted one.
How to field dress a deer for meat
The most important tool you need for field dressing is a good quality knife with a well-honed blade.
If you have one, a portable gambrel or hoist is also a handy optional extra, though it is definitely possible to field dress an animal without one.
Please note: this tutorial is supported by a video demonstration from David Dunne (scroll to the top of this post to watch).
Prior to starting
Examine the entry/exit wound. If you bow-hunted the animal, you want to check if the broadhead is still in the body before you begin cutting, but it’s also not a bad safety precaution to do even for rifle hunters, as bullet fragments can be sharp and can cause injuries.
Step 1
Bleed the carcass by making a vertical incision up the length of the neck from the top of the chest towards the head. Free the trachea (windpipe) and oesophagus (food pipe) from the neck muscles with your fingers or a knife, severing them both nearest to the head of the deer. You can tie a knot in the food pipe to ensure there is no spillage into the chest cavity in the following steps.
Step 2
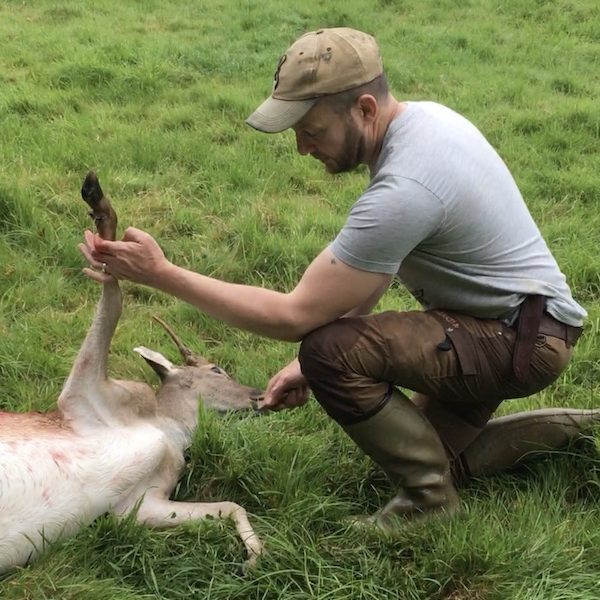
Spread the hind legs apart, remove any external genitalia. Cut a shallow 2.5cm (1 inch) slit through the skin, exposing the internal organs. Be careful not to puncture the entrails.
Step 3
Use the incision from step 2 as your starting point, hold your knife blade facing up (to avoid puncturing organs) and carefully run your knife blade up from the pelvic bone all the way to the breastbone. This is easier if your knife has a hook on it, but if it doesn’t, use your index and middle fingers to separate the hide from the internal organs.
Step 4
Roll the insides of the deer out of the incision you have made, exposing the bottom of the diaphragm (the thin membrane separating the chest from the abdomen). Using your knife, seperate the diaphragm muscle from the inside wall of the chest cavity.
Step 5
Reach in above the heart and lungs to the top of the chest and take hold of the windpipe. Give the windpipe a strong tug to pull it back inside the deer (towards you). Seperate the small muscle at the bottom of the lungs that attaches it to the spine. You can then seperate the other side of the diaphragm and remove the entrails entirely.
Step 6
The colon (or large intestine) will be the only thing still attached to the deer at this point. Squeeze your fingers along the large intestine to clear a portion of it from any faecal matter, then cut through it with your knife. You can tie the end that it still attached to the deer, which will prevent any faeces from contaminating the inside of the carcass.
Step 7
If you plan to keep the heart, liver or kidneys, these can be cut free now and placed into a bag or container.
Step 8
Dispose of the entrails (it’s not good hunting etiquette to just leave these in plain view, particularly if hunting on public land). If you’re field dressing on the ground, flip the animal back onto its stomach, spreading its back legs and chest cavity as much as possible to aid in draining the blood. Try not to let dirt or other debris come in contact with the meat.
Step 9
Remove the head by holding one ear and pulling the neck taught. Make an incision behind the ear, slicing the tendons and muscles that connect the base of the skull to the top of the spine (see video – 3:25 mark).
Step 10
Remove the feet by slicing through the skin at the major joints on each leg. Then, take the foot and twist it around the leg to break the joint. Use your knife to cut through any skin still attached. Tip: cut above the first joint on the back legs and where the knee bends on the two front legs (see video – at 3:50 and 4:10).
You can now transport your carcass out of the hunting area. Once you are home, you will need to remove the anus and the remaining section of large intestine.
Step 11
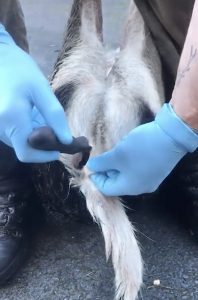
Remove the bum by making an incision down the side of the anus. Pull the skin around the anus away from the deer and continue cutting around the anus, being careful not to puncture the colon or bladder. Once the anus is completely separated, reach inside the abdomen to pull the anus and attached large intestine out of the carcass.
Help us keep hunting alive
I Am Hunter has a passion to keep hunting alive. We use education and advocacy to demonstrate the positive benefits of ethical, fair-chase hunting to all society, not just hunters.
We can provide this content free to the public thanks to the generous support of our awesome members.
For less than 50c a day, members help support the fight to keep hunting alive by spreading a positive message about hunting to the wider community. In return, members get access to exclusive member rewards.
See also

The NZ Deer Backpack
A simple video tutorial showing how to pack out a deer using the NZ backpack.

Removing the bum from a deer
Learn how to remove the bum from a deer with our field dressing expert, David Dunne.


13 thoughts on “How to field dress a deer for meat”
Thanks Jeff. Definitely easier to do while the animal is still warm. Everything gets a little more difficult as the animal cools down, including skinning it.
The best method I’ve ever seen. Very much like my old hunting Mate, Bruno’s method of gutting a deer. Your man makes it look so easy! Maybe it is if we start the job while the animal is still warm. Thank you.
A great piece of informative video for young hunters’ well done
He’s had quite a lot of practice! Let us know how you go when you do 🙂
Wow. He makes it look so easy !!! Can’t wait for my first deer.